
iSTAR Panoramas to add Detail to HDS Point Clouds
Introduction
Real world colour can be added to the points in a Point Cloud from co-centric 360° (spherical) panoramas and some users have found that it is also beneficial to take additional 360° panoramas. The following task takes this one stage further and uses 360° panoramas to add detail to a survey initially made with an HDS Scanner.
The Task
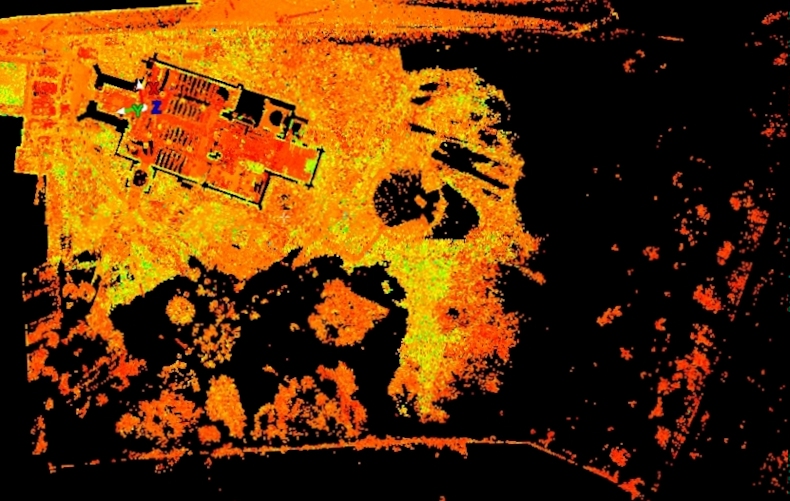
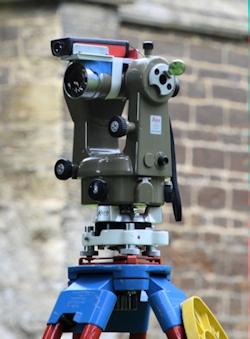
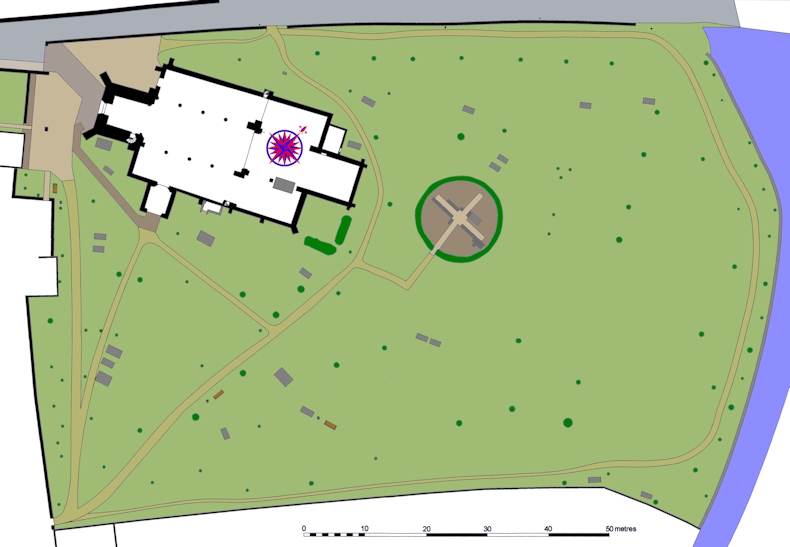
The requirement was to map the churchyard of a Church that had previously been scanned with a Leica C10 scanner, with the emphasis on plotting the trees. The tree coverage immediately ruled out any aerial photography or GNSS solution and the use of a Total Station, like a Leica Nova, was excluded by the fact that the budget consisted of a couple of peoples time with no financial element. In addition to the point cloud data I had an eclectic mix of assets. In the garage were some old, but serviceable, tripods and a Kern DKM2-A 1″ theodolite which, despite its age, is in perfect order. I also had a Leica DISTO, an NCTech iSTAR camera and various software packages including LISCAD.
The solution
The first step was to map the Church footprint and boundary walls from the point cloud PTS file using LISCAD‘s “Point Cloud” module. The point cloud data was of the Church and picked up the boundary wall on the north west and some of the boundary wall on the south east sides of the site, but the ground slopped away to the east and south of the building and the scanner recorded the tree canopies rather than the tree trunks, which is what we were interested in plotting. This provided an accurate base map to add to.
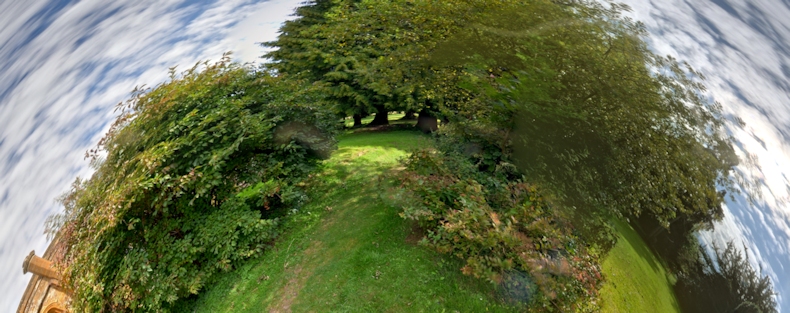
 During the 1970s and 1980s I found that one of the best methods of mapping trees was using a Plane Table. The photograph on the left shows Plane Table Surveying by BES Young Explorers in 2004 in the shadow of Ol Doinyo Kerimasi in northern Tanzania, a place of very few trees! At that time distance measurement required something to measure to, like a vertical or horizontal staff or a prism, so it was easier to intersect the trees directly plotting them to the plan. As detailed in “360° Panoramas for Photogrammetry“, a 360° panorama is a projection rather than an image and can be transformed to a “Little Planet” or “Mirror Ball” projection with the centre at the nadir, which has the property that that the directions from the centre are exactly the same in the projection as from the same location on site so that Horizontal Angles can be readily determined.
 The next step was to use the old Plane Table technique by using the “Little Planet” projections with the “Background Image” option in LISCAD to radiate (intersect) the tree positions. The locations of the iSTAR camera was measured using the Kern DKM2-A with the DISTO fixed on top. It may appear to be more logical to have done the whole survey with the DKM2-A and DISTO combination, but using this instrument was a stark reminder of how the instruments, and therefore methodology, we use today have advanced. Having sighted the target the mirror needs to be adjusted to let the light in to read the Horizontal Angle with the vernier, which is then hand booked. The process is then repeated for the Vertical Angle. Using the DISTO however was a huge improvement on two people measuring the radial distances with a Fibron tape. Back in the office it is necessary to compute each observation to correct the distance for the displacement of the top mounted DISTO as the telescope is tilted. All of this is very time consuming and error prone even though the results were accurate to a millimetre or two, so using the panorama projections saved a lot of time in the field and back in the office. The panoramas also provide an excellent way of looking around the site without having to physically revisit it. A property of scanning is that it measures to the first object the laser encounters. An obvious fact, but it is often difficult identify features when looking at the point cloud alone and having 360° panoramas to virtually look around the site was a distinct advantage. For example, the south east boundary wall was obscured by vegetation for a considerable part of its length but it was easy to identify which parts of the actual wall had been scanned by viewing the panoramas.
Using the panorama projections inside a building, like in the example in “360° Panoramas for Photogrammetry“, was relatively easy as the detail was readily recognisable, but I found that trees looked very different from different locations and that it was hard work using the “Little Planet” projections (as in the following image) to identify them because of the distortion caused by the projection. I therefore reverted back to using the “Equirectangular” projections to determine the horizontal angles to plot the points as it was very much easier to see which tree was which.
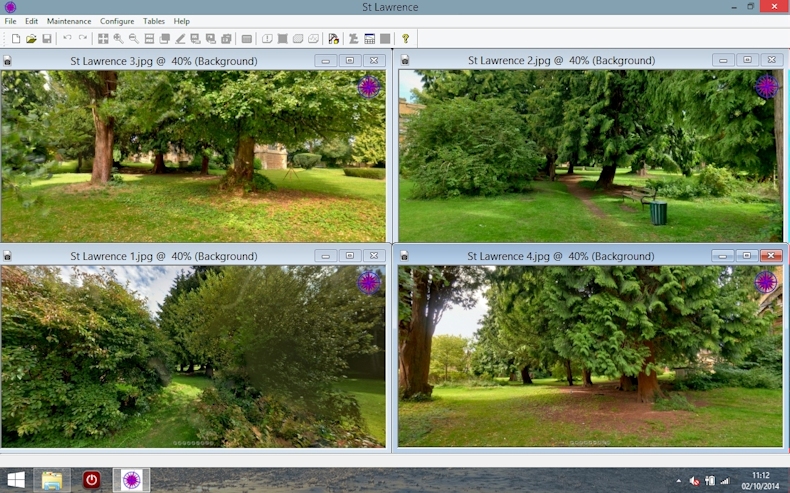
The best solution would be to have two to four of the interactive panoramas displayed to the screen at the same time whilst being able to zoom and pan in them, as identification is even easier, with software that determines the co-ordinates of a point picked in two or more of the panoramas and displays the quality of the data based on such information as the angle of cut of the intersecting rays. Unfortunately my mathematical and programming skills have “rusted” over the years so we will have to see if some enterprising person can take up this challenge.
Using the 360° panoramas taken with the iSTARat fixed locations I was able to fill in much of the detail, especially the trees, not picked up by the scanner. The survey was completed by triangulating in the few remaining trees.
![]()
To use co-centric 360° panoramas or the scanners internal camera?
The decision whether to use the scanner’s internal camera, if it has one, or an external camera co-centric with the scanner will depend on a number of factors including site conditions, personnel and available equipment.
Before cameras were built into scanners the way to get real world colours on to the points in the Point Cloud had to be to use an external device and this method still has many advantages. The user has control over the quality of the photography, the external solution is very much faster than using the internal camera, panoramas can be recorded at the same time as a scan at another location saving even more time and panoramas at locations other than the scan locations can be recorded.
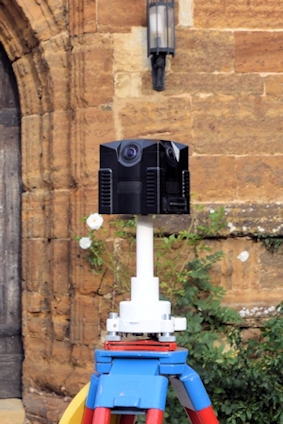
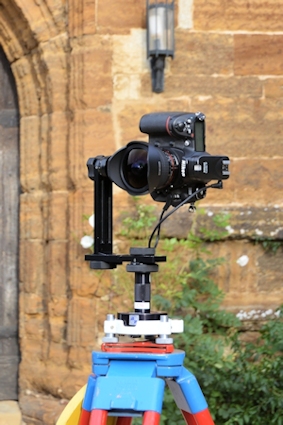 It goes without saying that a scanner is designed to scan so there has to be a compromise with an internal camera using the same optical path. This must put physical limits on the control the user has over the imaging. To start with, the field of view is severely restricted so a large number of images is required, which takes some time to record. A typical time for the scanner to record all the images is five minutes or more whereas it takes less than one minute to record all the images with a DSLR and head like a Nodal Ninja, shown on the right, even shooting five exposure HDR (High Dynamic Range photography), and less than half that time with an iSTAR, shown on the left, shooting three exposure HDR. On a recent project two of us made 24 scans of another Church with the photography using a Nodal Ninja head rather than using the scanner camera. Not only did we have superior quality imagery, which we could enhance if required, but five additional minutes per scan would have added another two hours in the field and could have meant having a second day on site!
I have been training on and supporting the use of an external cameras for panoramas to get real colours onto the points in a Point Cloud since the early days and two apparent disadvantages of using this method are that there is often a whole new learning curve, not just with creating panoramas, but often also with the photography aspect, and the methodology required to get the colours on to the points.
Taking panoramas with a head like a Nodal Ninja requires photographic skills to ensure correct exposure of and focus on the subject of interest. Skills are also required to take the panoramas so that the correct number of images are taken with sufficient overlap and the rig is set up correctly so that the NPP (No Parallax Point) is located correctly. These difficulties are eliminated with a camera like the iSTAR as the camera does everything for the user and the camera geometry is fixed and calibrated.
To get the colours on to the points, in Leica Cyclone for example, requires creating Cube Images from the panorama and “fitting” these to the ScanWorld. This process requires quite a lot of user intervention, but has now been eliminated by another product from NCTech. ColourCloud fits the colours captured with an iSTAR camera to an e57 file creating a coloured e57 file in one easy step. ColourCloud is easy to use, fast and accurate.
Conclusion
Considering all aspects I feel that having an iSTAR camera on site to be hugely beneficial for use as an external camera creating co-centric panoramas for scans and for additional photography, which can then be used to add to the survey back in the office if its location is recorded on site. Using an iSTAR is as straight forward as taking images with a digital camera, but If a picture is worth a thousand words then a 360° panorama, where you can look all around, must be worth ten thousand.
November 2014
![]()