
Correct Focus and Exposure are crucial in photography, but in this age of autofocus and autoexposure it is vital to remember that for some applications we need to take control of these two factors, which of course are interrelated.
Such applications include slowing down the shutter speed to capture the “movement” of the subject, such as flowing water, and when taking Panoramas.
Focus
When creating a Panorama it is necessary to think about the point that the lens will focus on when in autofocus mode. The camera is aimed according to the number of images required to create the Panorama as considered in Using The Nodal Point.
In some cases we do not have a choice of switching autofocus on or off as some cameras and camera-lens combinations cannot be switched to manual focus whilst others do not have an autofocus option. For example, a Sigma 8 mm lens has autofocus capability when fitted to a Nikon D70 or D80, but not when fitted to a Nikon D40 or D60.
If manual focus is not available then care must be taken in choosing the directions the camera is aimed to so that the focusing point of the lens is aligned with a suitable part of the image, but if there is a choice I would recommend using manual focus so that the photographer is in control. For a 360° Panorama in an open room, or a scenic Panorama, letting the camera do the focusing is the easiest method, but for a 360° Panorama outside, where some of the points the camera will try to focus onto are sky, it is necessary to set the focus manually.
The images below were used to create a full 360° Panorama of the Viking Longhouse at the Ancient Technology Centre. Enlargements of the centre of the images shows that for some of them, there is nothing for the camera to focus onto if left in Autofocus mode.
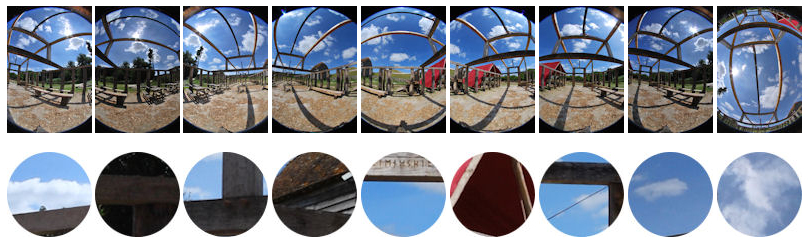
The Focus does need to be considered in connection with the Exposure as smaller aperture and slower shutter speed will increase the depth of field.
Exposure
Correct exposure is important to get a great Panorama. Many articles related to panoramic photography suggest that the aperture and shutter speed should be determined prior to taking the photographs and that these values should be used for all the images, but I find that this approach does not work for me as it is clear that the lighting will change, sometimes dramatically, as the camera is rotated. I find that packages such as PTGui and PanoramaStudio make an excellent job of blending the images so vary the exposure according the direction of the camera to accommodate the light conditions for that image.
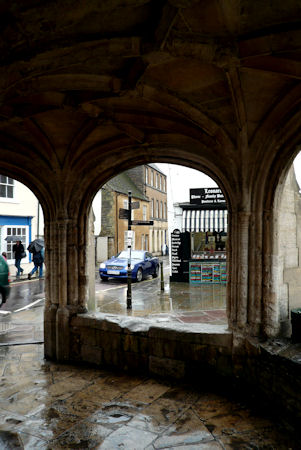
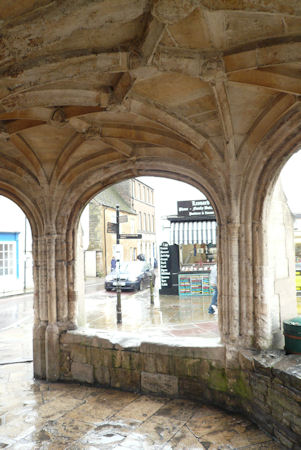 The same criteria as for focus applies to the exposure in that it is necessary to consider what points in the image are going to control the values if the camera is set to autoexposure. For example, when taking a 360° of an open sided building, such as say a Buttercross or Cupola, where the subject of interest is likely to be the inside of the structure, it is highly probable that the autoexposure points of the camera will align with the much brighter parts of the image outside of the structure so the subject of interest is grossly underexposed. In such a situation manually setting the aperture and shutter speed and keeping it the same for all the exposures is probably the best method.
Many subjects for 360° Panoramas will have have a full range of lighting from very dark to very light, especially in locations such as rooms with dark corners and openings to a bright outside world, so it is often a good idea to bracket the exposures and experimenting with HDR (High Dynamic Range) photography could produce the answer you are looking for.

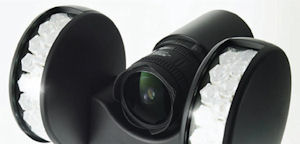
 There is a solution that takes care of all the Focus and Exposure requirements should your application warrant the investment. Spheron’s SpheroCam HDR camera takes HDR to the limit. This camera captures a 360º panoramic 50 Mp image in a single scan and is the first camera able to measure real world luminosity values, from the darkest shadows to the brightest sunlight, with up to 26 f stops of dynamic range in one single scan. The camera is designed for mobile use with an automated post-processing engine and integrated GPS providing position and time stamp.
Equirectangular and Cube images produced from the data captured by the SheroCam are optimised pixel by pixel to get the best result from the very high dynamic range capabilities of this camera making it ideal for subjects that have a very large difference in lighting.
There is also a 3D measurement solution by capturing two fully spherical images using the SpheroCam HDR with its precision calibrated fisheye lens and 3D measurement tripod.
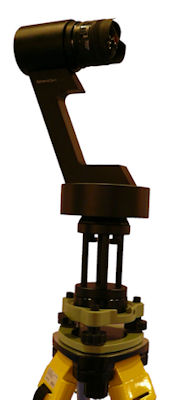
As discussed in Using The Nodal Point, 360° Panoramas have an application in HDS (High Definition Surveying) where scanners produce a ‘point cloud’ where each point in the image has a 3D co-ordinate, but the colour of the point is determined by the reflectivity of the surface that the point is on, but many users would like to have the ‘true’ colours of the points in the point cloud. The photograph on the right shows the SpheroCam HDR mounted in a Leica Tribrach so that the Nodal Point is coincident with that of a Leica ScanStation 2.
 The HDS scanner uses its own laser to measure the points so does not rely on ‘light’ as does photography, so can be used in any lit or unlit environment, including total darkness. Attempting to illuminate a scene for a 360° Panorama in poorly lit conditions is, to say the least, challenging, but a recent addition (February 2009) to the spheronVR solution overcomes even this aspect making it possible to provide ‘true’ colours to the scanned 3D points, even in difficult locations such as railway tunnels at night, with partial areas covered by soot.
![]()