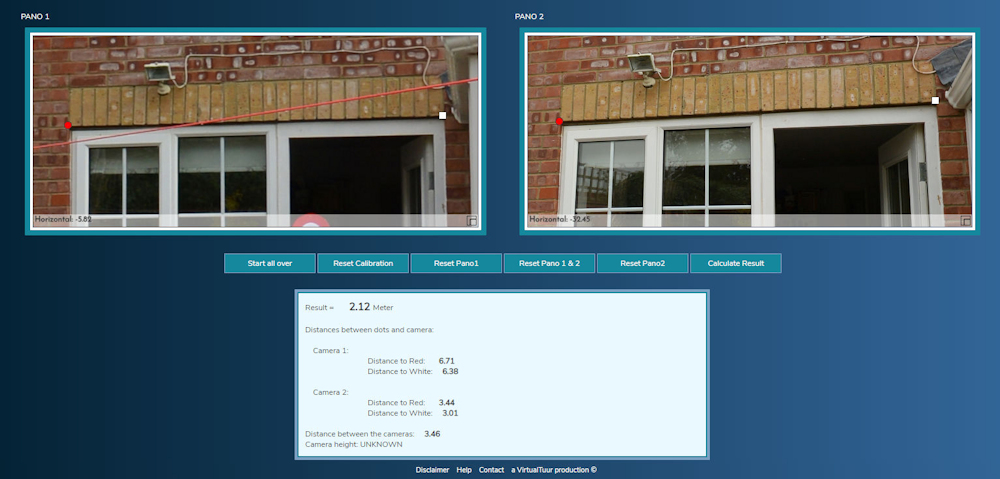
It was in the summer of 1973 when I had the idea of using 360° Panoramas for measurement. Back then the digital personal computer and digital photography were science fiction. These technologies developed and evolved and towards the end of 2020 I encountered PaMe, an application for extracting measurement from a pair of 360° Panoramas.
PaMe comes in two variations:
PaMe Wizard is a Krpano add-on providing a ‘measure tool’ in a ‘Krpano driven’ Virtual Tour.
PaMe Light is a web based tool that allows you to just drag and drop your 360° Panoramas from your desktop.
Both versions have three methods of controlling scale: “Known distance between panoramas” (base line), “Known height” and “Known length” in the subject area. PaMe Wizard has a fourth option which is to use GNSS locations for the two Panoramas, but consumer GNSS values are not sufficiently accurate in most case so it would probably require a survey (engineering) grade unit such as supplied by Leica Geosystems and Trimble to achieve a good result with this option.
My personal choice is the “Known distance between panoramas” or “Known length” or both depending on each individual application as mentioned later.
GNSS = Global Navigation Satellite System including the USA’s GPS, Russian GLONASS, European Union’s Galileo and China’s Beidou.
PaMe is straight forward to use with ‘on screen’ instruction and good tutorials so there is NO ‘steep learning curve’.
PaMe Light is excellent for experimenting with the application before committing to purchase PaMe Wizard.
It is worth mentioning that as PaMe Light is browser based so that the speed at which the panoramas load depends on the browser you are using and two 50Mb (75Mp) panoramas took some 30 seconds to load in my browser so initially it is advisable to start with panoramas of around 10Mb. Once the panoramas have loaded working with them is in ‘real time’.
There are some considerations when taking the panoramas for measurement:
The two panoramas should be in the same horizontal plane and taken with the ‘geometry’ in mind as explained in the user guides;
The resolution of the panoramas must be enough to see and ‘label’ the lengths you want to measure;
The location of the panoramas should be marked so that the distance between them can be measured and the panoramas orientated in the application.
If you are already into 360° Panoramic photography then all you need to start measuring is the PaMe application and the Krpano software to use PaMe Wizard.
If you have not yet discovered the world of 360° panoramic photography the equipment needed is available ‘off the shelf’, affordable and reliable. You will need a camera, camera support and measuring device.
There are a variety of single shot duel lens 360° panoramic cameras to choose from or more costly multi lens ones and you can use a ![]() ‘conventional’ camera with a fisheye or ‘normal’ lens and a panoramic head.
‘conventional’ camera with a fisheye or ‘normal’ lens and a panoramic head.
Experimenting with a couple of single shot duel lens 360° panoramic cameras has proved disappointing and best results were obtained suing a fisheye lens with a DSLR or Mirrorless body and panoramic head.
To support a single shot dual lens 360° panoramic cameras all that is required is a ‘pole’ which could be a selfie-stick or monopod, but it 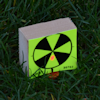 is advisable to use a Staff Bubble to ensure the camera is exactly above the ‘ground mark’. If a panoramic head is being used then a tripod is needed, with a plumb bob to ensure the camera is exactly above the ‘ground mark’.
A conventional tape measure can be awkward to use, especially if you are on your own, and a laser distance meter does not cost much more and is much more convenient so I would recommend using one to measure a ‘known distance’ between two points or the ‘base line’ between the panoramas. For this a small target (e.g. block of wood 50mm x 50mm x 20mm) is useful to aim the laser to and provide a ‘target’ when orientating the panoramas in PaMe.
Procedure
Arrive on site and decided where the 360° Panoramas are to be taken and mark these locations on the ground with a suitable temporary environmentally friendly mark. (e.g. a small piece of electrical tape on hard standing or golf tee on grass).
Capture the 360° panoramas ensuring the camera is exactly vertically above the ground marks and the two panoramas are in the same horizontal plane.
Measure between two suitable points in the subject area or between the ground marks .
Another alternative is to place something of known length (e.g. a Levelling Staff horizontally) in the subject area.
It does not matter if the panoramas are captured before measuring the base line or if the base line is measured before capturing the panoramas.
Repeat for any additional pairs of panoramas.
Note that PaMe extracts actual measurements from the panoramas so there is no need to reference one pair of panoramas to another.
The ‘field work’ is now completed in minutes and you are ready to return to the ‘office’ and take off the measurements you require.
Start PaMe and load a pair of panoramas.
Decide what protocol you are to use (e.g. “Known length” or “Known distance between panoramas”) and enter the distance.
Orientate the panoramas as detailed in the user guide and prompted on screen.
You are now ready to take off the measurements you require.
Why use 360° Panoramas for measurement?
Non-contact (remote) measurement is often desirable and sometimes essential and using photography means having a record that can be re-visited at any time.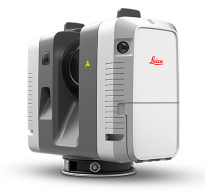
The most obvious choice may be LiDAR (Laser Scanning) where millions of 3D points can be measured to millimetre precision in minutes, but this method requires substantial investment in the hardware and software needed and the associated training and computer equipment. The use of the equipment needs to be maximized to justify such an investment.
An alternative using more versatile equipment is measurement with a Reflectorless Total Station or Theodolite Intersection. Both these methods still need considerable investment and require very much more time on site with the disadvantage, which may be obvious, that the data taken back to the ‘office’ only consists of the points measured on site. If more measurements are needed it is necessary to return to the site, which may have changed or even may no longer exist. Using a Total Station with built in camera or fitting a camera to the 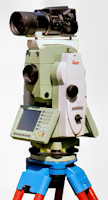 instrument can provide the photographic element, but there are important considerations as Photographic Intersection requires the camera to be calibrated for lens distortions (e.g. barrel or pincushion distortion), the relationship of the principal ray of the lens to the principal ray of the theodolite telescope as it is probable that these will not be truly parallel and the relationship of the lens NPP (No Parallax Point or Nodal Point) to the Trunnion Axis of the Theodolite bearing in mind that the NPP is probable not a single point as in most lenses it slides along the principal ray depending on the angle of the incoming ray.
 Another option is Stereo Photogrammetry which also requires the lens to be calibrated unless you have access to a metric camera such as a Wild P31 or Wild P32 where distortion is just a few microns in the corners of the large format image. Control Points are usually used to ‘fit’ the stereo model to the subject and these need to be co-ordinated by measurement with a Reflectorless Total Station or Theodolite Intersection. If there is sufficient detail in the right places then these can be used as the Control Points, but in many cases targets are needed to be placed in the subject area which rather negates the non-contact element.
Capturing the 360° Panoramas uses available, affordable and reliable ‘off the shelf’ equipment costing a small fraction of that required for the foregoing methods. Extracting measurements from 360° Panoramas using PaMe is straight forward so there is NO ‘learning curve’. The equipment required is light, easily portable and does not need for its use to be maximized to justify the investment. The choice of method will depend on the accuracy requirements as this method is centimetre rather than the millimetre accuracy possible with the other methods.
The accuracy of the measurements will depend on a number of factors including the resolution and precision of the equirectangular images. Although my investigations were limited they suggested that the equirectangular images produced by blending the two hemispherical images from a dual lens camera could be improved by using just the front lens rotated about its NPP with four shots round using a Nodal Ninja R1 and stitching in PTGui.
Another method of improving accuracy is to use two tripods so that the tripod without the camera has a target to use for orientation the 360° Panoramas in PaMe and the base line measured between the tripod tops eliminating errors in the camera not being exactly above the ‘ground marks’ and eliminating the need for marking on the ground.
Applications
The possible applications for this measurement method are only limited by your imagination.
Following are five suggestions to stimulate that imagination:
You are asked to quote for replacing windows in a property. Although you will need precise measurements to manufacture the windows so they fit you know that the home owner will get at least three separate quotes from different suppliers so it is advantages to spend as little time onsite as possible. It only takes minutes to capture the panoramas and measure the base line(s) and return to the ‘office’ to take off the required measurements for the quote at your leisure. Should the home owner later ask how much to include a new door it is a matter of minutes to use PaMe to take off the additional measurements and amend the quote without the need to revisit the site.
A log pile is to be assessed for timber extraction. Log piles are notoriously ‘not safe’ so a non-contact measurement system is desirable. The equipment needed to capture the panoramas is compact, light and portable which is an advantage if the log pile needs to be reached on foot. The Forester arrives on site and captures a set of pairs of panoramas and their base measurements in a matter of minutes, without any danger, and has all the information required to take off the required measurements back at the ‘office’.
Note that PaMe extracts actual measurements from the panoramas so there is no need to reference one pair of panoramas to another.
The application is also useful for monitoring such subjects as river or coastal erosion where site access can be dangerous so non-contact measurement is required. As PaMe extracts actual measurements there is no need to establish permanent ground marks for repeat visits as required by co-ordinate based methods.
Excavations on archaeological digs are often painstaking as the subject can be delicate so unnecessary contact is to be avoided. Using 360° Panoramas and PaMe enables important measurements to be recorded without disturbing the ‘dig’ with the added advantage that the detail is recorded photographically capturing textures and colours.
Measuring rooms can be awkward, even with a laser distance meter, as they are seldom devoid of furniture and other obstructions. Measuring each room with a pair of 360° Panoramas is quick and straight forward. It is important to consider the ‘geometry’ so points of interest are not in poor locations. The process could be ‘streamlined’ by having tripod mounted fixed length bars (e.g. 1m and 2m) with a camera at each end so the base line is always a fixed value and the cameras the ‘targets’ for orientation in PaMe. If you use this system you would already have all the necessary equipment and software to record a 360° Panorama in each room and build tours to show prospective customers so they can get a good feel for the property without actually having to visit it. They can see the detail such as where the doors and windows are relative to other features, if there is a fireplace and how big it is, where the light fittings are and the height of the ceiling, to name a few. Consider the potential viewings that never took place because the people looking were not inspired by the words and photographs and the viewings that led nowhere wasting valuable time.
I hope that these examples trigger your imagination suggesting applications where using PaMe the take off measurements from pairs of 360° Panoramas would be useful.
What are the costs?
The cost will depend on the combination of equipment.
There is a huge range of options to choose from. .
There is a wealth of information relating to 360° Panoramas on the Internet.
If you have any questions you can contact me at: 360musafa@gmail.com and I will answer them the best I can.
 |
Example Setups Some examples which were originally used to evaluate the accuracy of using equirectangular images as a ‘photographic The ‘points’ were circular targets which were measured relative to the 360° Panorama locations using a Kern DKM2-A 1″ Theodolite and Leica DISTO. |
|
 |
Use 360° Panoramas for ‘Real Life’ Measurement PaMe provides two applications for getting measurements from 360° Panoramas. PaMe Wizard is a Krpano add-on providing a ‘measure tool’ in a ‘Krpano driven’ Virtual Tour. This full version contains four ways of measuring, with the ability to save the calibrations (which can be ‘locked’) and provide ‘real time’ measurements. PaMe Light is a web based tool that allows you to just drag and drop your 360° Panoramas from your desktop. This light version has three ways of measuring. |
|
 |
PTGui PTGui is panoramic stitching software for Windows and Mac OSX. Originally developed as a Graphical User Interface for Panorama Tools (hence the name), PTGui now is a full featured photo stitching application. Use PTGui to stitch any number of photos into a panoramic image. |
|
 |
Nodal Ninja Nodal Ninja is a specially designed spherical tripod head allowing the photographer to adjust a camera and lens so the “entrance pupil” (front nodal point) is exactly over its correct rotational axis. Their web site states “The lightest smallest panoramic tripod head on the market today. Nodal Ninja is a solution for both amateurs and professionals alike that seek precision, portability, reliability as well as top notch support.” |
|
 |
Red Door VR Limited UK are UK stockists and Business to Business distributors of Nodal Ninja, Giottos, Panosaurus, Promote® Control, VR panoramic photographic hardware, equipment and software, and adapters for use with Leica HDS Scanners. Red Door VR Limited are an exclusively a Mail Order supplier based in the UK (Leeds and Lancaster), and their website is their virtual showroom. They are a small specialist company, who pride themselves on their level of product knowledge and customer satisfaction. |
|
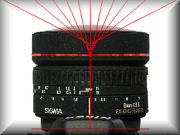 |
Finding the Nodal Point of a Lens For a lens to be used effectively for 360° Panoramas the location of the Front Nodal Point (No Parallax Point) must be accurately determined so that the camera/lens combination can be rotated about this point. |
|
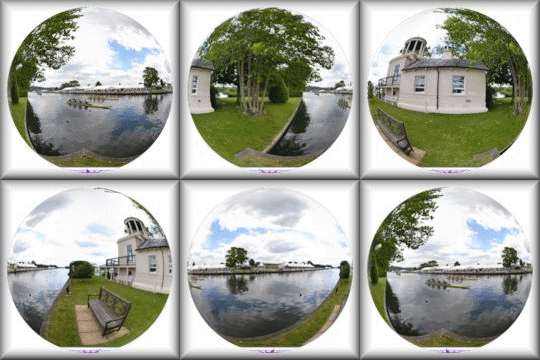 |
360° Panoramas If a picture is worth a thousand words then a panorama must be worth ten thousand, especially a 360° (or spherical) panorama where you can look all around and in any direction you wish to. |

